Putting an account online will ensure our customers are protected and that their system is up and running! Once a system has been installed you will receive a contract from the technician with this contract you will have all important information about the customers account to get them connected to our central station for monitoring. You will use the contract, Engarde, Alarm.com, and Avantguard to get everything set up!
The first step is to transfer the information on the contract and put it into Engarde.
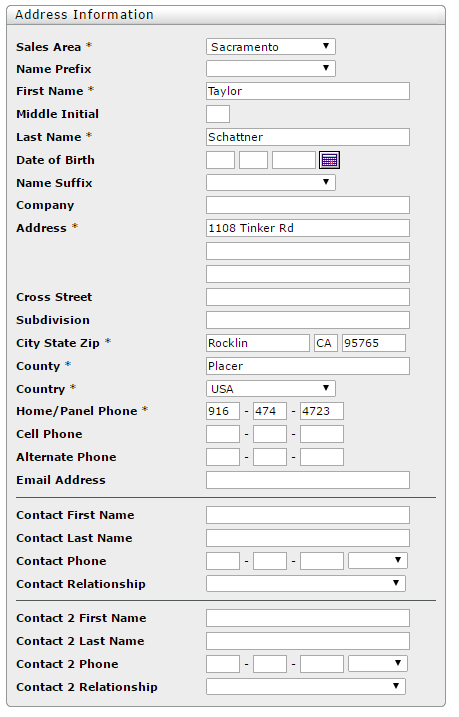
On Engarde you will enter all customer information from the SOP (schedule of protection) and AMA (alarm monitoring agreement). The KEY information from both forms will be the billing info and the abort code/password. First, you will want to click on "New Customer" from here you will enter all information from the contract into the system. Make sure you pay CLOSE attention to the billing and abort code. You will enter all *starred information that is required. In address information enter it as follows:
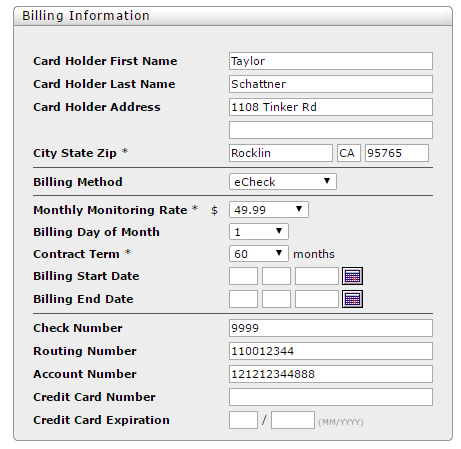
Then you will enter the billing information for the monthly monitoring for the customer. In billing method, you will select either eCheck (for autopay from a checking account) or Credit Card (for debiting a credit card). Select the amount of the monthly monitoring rate that the customer has selected, the date of the month they want their payment to be taken out (if no date is specified select the install date) contract term (60) and enter the billing information. (TIP: since there are only 28 days in Feb. we can only bill people on the 1st-28th of the month so if they are installed on the 30th put their bill date on the 1st):
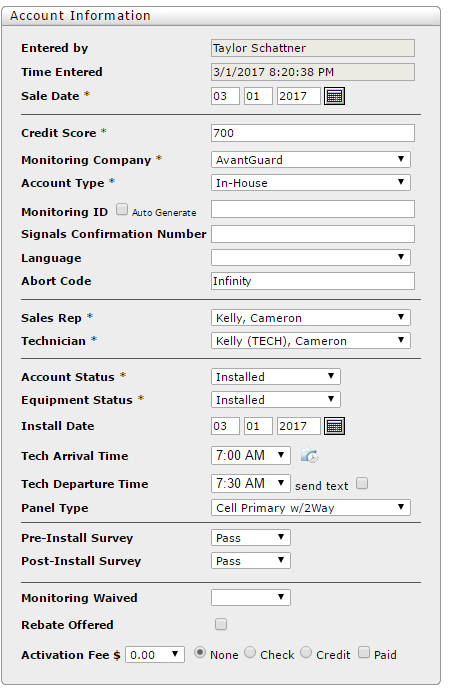
Next, you will enter the account information. Put in the sale date, credit score (700 will be your default), the monitoring company will always be Avantguard, account will always be InHouse, leave the account number blank until you log into alarm.com to put the account online with Avantguard, skip to Abort Code and enter in the word selected by the customer (extremely important that this is correct). After that select the sales reps name, techs name, then account and equipment status as installed, enter the date and time, always select Cell Primary/2way from panel type and hit save.
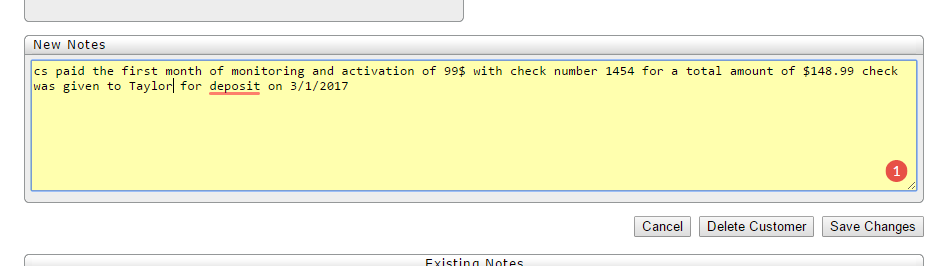
Next, you will set up their billing. First, you will want to charge them the amount on the contract for set up. This will be their first month and any additional fees associated with their account. If the customer has written a check for the first payment make sure it is noted in the notes. You will click on "edit customer" scroll down the notes section and enter in the notes like below with as much information as possible:
To bill customer select "Billing" then select the appropriate account type, bank name (if unknown google the routing number to get the bank name), enter transaction subtotal, tax amount (if applicable, if not enter 0), and the transaction category:
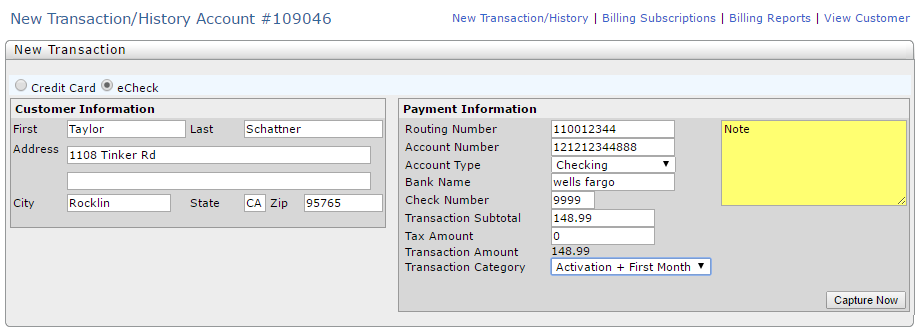
Once all information is entered select "Capture Now". With checking accounts it will show "approved" if all information is valid. This does not mean that the charge cleared but just that the routing number is a valid routing number. Whether you are charging a checking account or credit card and it comes back declined, verify that the information was entered correctly from the contract and if it is not you will need to correct it on the main customer page and select "save changes" and recharge the account. If all information matches the contract, reach out to the sales rep to have them contact the customer to get the correct information. Once the correct information is received enter the information on the main customer page and recharge the customer.
After a customer has been charged the initial payment you will need to set up a subscription for the system to bill them every month. To do this you will select "Billing Subscriptions". You will then enter the appropriate payment information. Make sure you enter the correct monthly monitoring amount, then the transaction category, and most important the frequency (every 1 month), bill start date (this will be the following month on the billing date of the month entered above), and "No End Date" like below:
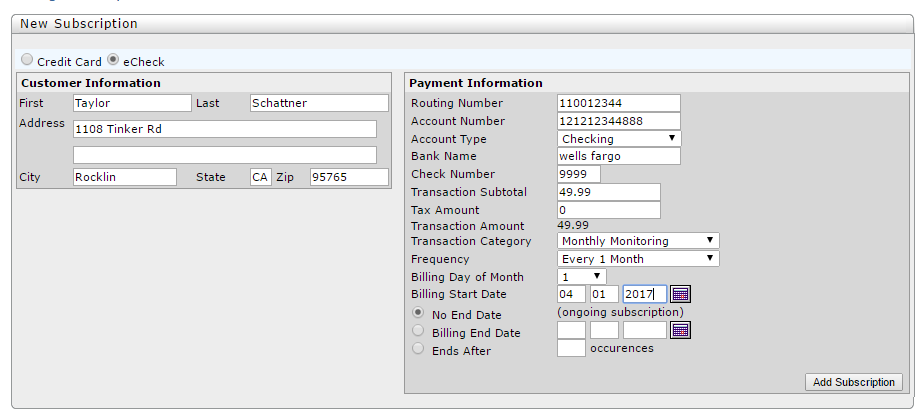
After all information is entered into the system you will select "Add Subscription". This will set up automatic billing for the customer every month for their monthly monitoring. Make sure that subscription shows in the "Current Subscriptions" as it does below to make sure the customers billing is complete:

The second step will be putting the account online with the central station
The central station is what connects the customer's system in their home to the appropriate emergency response. For this, you will need to log into your Alarm.com account and search the customer's name. Once you have located the customer you will pull up their account and log into your Avantguard account and Engard account as you will need all 3 to get the customer up and running.
Once in Avantguard, select "New Account". On this screen you will enter all the customer information from Engarde (name, address, phone, and passcode):
(TIP: select the + button to add additional fields)
On the contract, you will find the emergency contact list. You will enter the information in the following fields (make sure you give them "All Access" and select the first contact as the ECV (enhanced contact verification)) to add a phone number select the phone icon:

This contact list is extremely important. When the alarm is triggered it will first come over the panel to speak with whoever is in the home. If no one responds on the panel the central station will then begin to call down the list of contacts. If the first contact person is called and they do not answer the central station will begin dispatch. The only way a dispatch can be called off is if someone on this list can verify that everything is "OK" and give a valid password. This is why it is extremely important that this information is entered correctly. This will eliminate any false alarm fees a customer may incur for not verify a valid false alarm with the central station.
Next, you will set up the zone list. To get the zone list you will go to the customer's equipment list which can be found on the left-hand side under "Equipment":
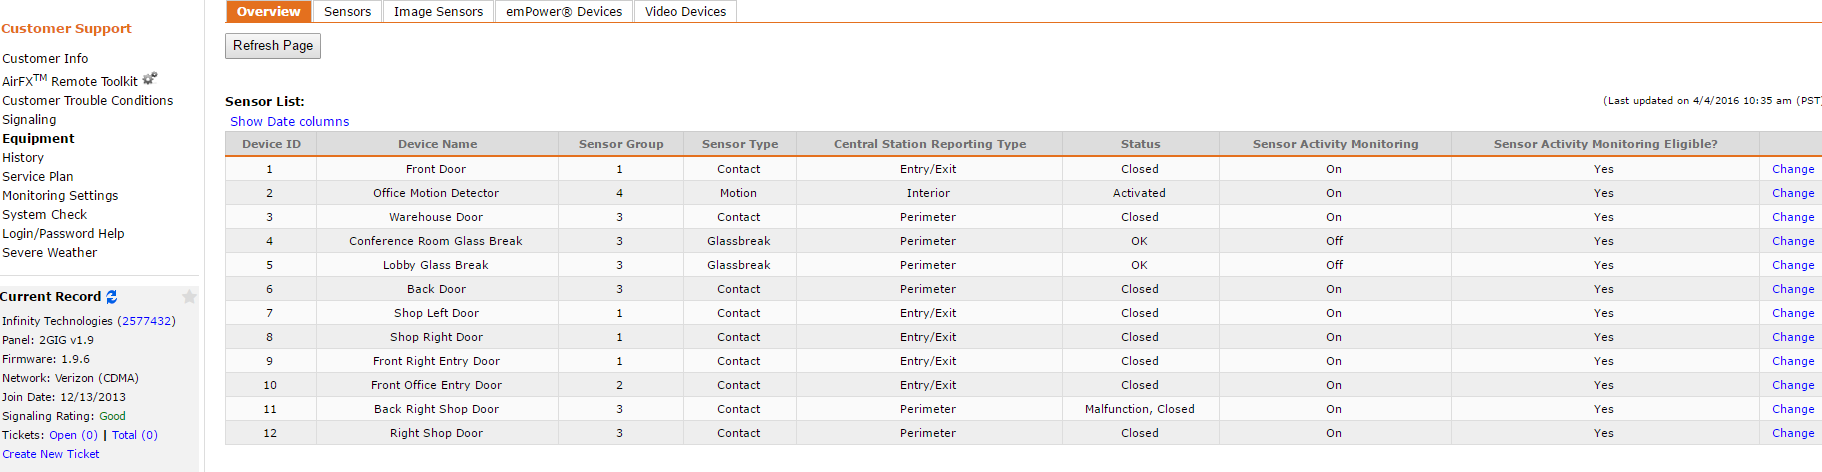
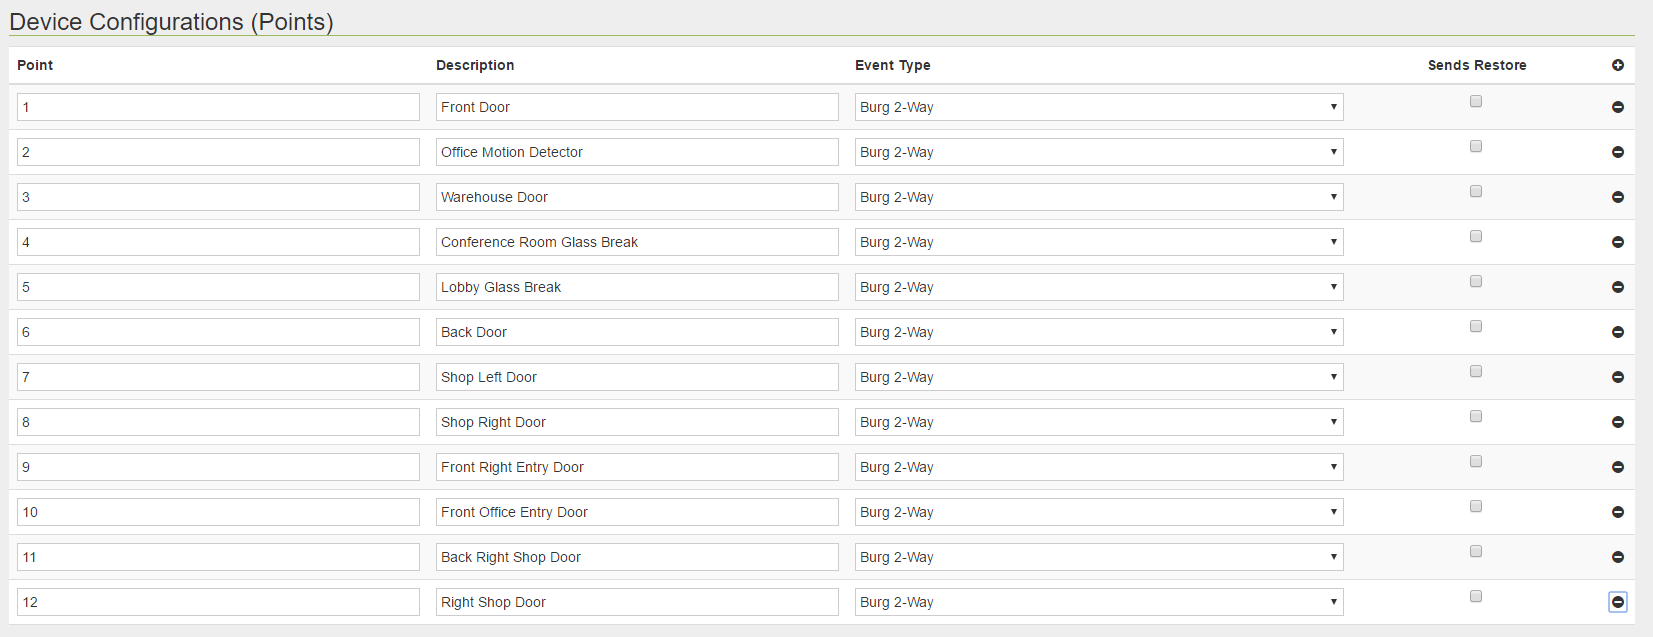
From here you will enter the "Device Configurations (Points)" into Avantguard. Select the + button for the amount of devices listed in the equipment list on Alarm.com. Each "point" and "description" in Avantguard is the same as "Device ID" and "Device Name" in Alarm.com respectively. For "Event Type" always select "Burg 2-way" like below:
Once this is completed you will go back to Alarm.com and click on "Customer Info". On this page, you will find the account number. This number is what connects the customer's system to the central station. It is found under "CS Account Number":
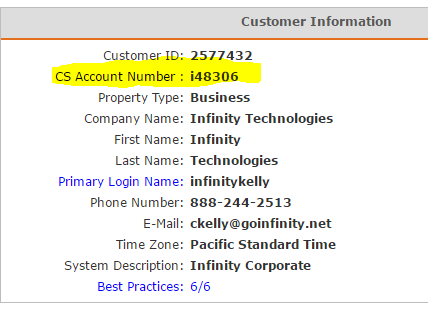
You will take this number and add it to Avantguard under "Account" at the top and from the drop down for status select "Active" and you will finally hit "Save". This will put the account "Live" with the central station.
Once the account is live go back to Engarde and under "Monitoring ID" in the Account Information section you will put that same "CS Account Number" and select "Save Changes" and the account is officially online and being monitored!
Support Numbers
If you are having issues with putting accounts online you can always contact the support centers.
Avantguard 1 (866) 880-9591
Engarde 1 (385) 234-6655
Alarm.com 1 (866) 834-0470
Or you can always come to me!